If you or someone you know has an abundant fruit tree, the task of eating all the fruit before it goes bad can be daunting. Preserving the fruit (canning) is a good way to enjoy the fruit long after the tree has been picked clean.

Today, my friend Brian brought over a box of peaches. These are some of the sweetest peaches I have ever eaten! Instead of making jam (another good way to use fresh fruit), we decided to can the peaches so we can have them over the fall & winter.
When canning, the first step is to make sure you have the right tools. Make sure you have washed everything in hot soapy water before you start.
Home Canned Peaches with Judy and Brian
Tools of the trade:
- Jars with bands and new lids (yep, if you are going to can you need jars!). You can get these at most grocery stores and home stores (Cost Plus, OSH, Ace Hardware). If reusing the bands, make sure they are not rusted. NOTE: Do not ever reuse the lids, even if you sterilize them. They won’t seal properly causing your food to spoil. They are meant to be thrown away after one use.
- A big, big BIG pot (pressure cookers are good)
- A jar grabber
- A ladle
Other tools that come in handy but aren’t “needed”:
- A Lid holder (to sterilize the lids)
- A funnel
- A lid grabber
Step 1:
The first step is to sterilize the jars and lids. You can do this in the dishwasher, or you can use the large pot.
If you are using the pot, fill it part-way with hot water and place the jars inside (add the lid holder if you have that too). Add additional water to cover the jars completely. Turn the burner on HIGH and bring to a boil.
Boil for 15 minutes. (Move to step 2 while waiting for the jars to boil) After 15 minutes, turn off the water and keep the jars & lids in the hot water until you are ready to use them.
Step 2:
While waiting for the jars, prepare the fruit. When canning peaches, you can cut them however you want (half, diced, sliced). We decided to try them sliced for this batch.
To keep the peaches from browning, add the juice from half a lemon to the fruit (I do half a lemon per bowl of peaches). Put the fruit into the fridge until chilled.
Step 3:
For canned peaches, you need to add syrup to the jars with the fruit. Since these peaches were extra sweet, we decided to use a light syrup. You can choose a heavier one if you prefer. Using the chart below, add the water and sugar to a pan and bring to a boil. Keep the syrup the boiling on low until you are ready to add to the jar.
Syrup Recipes:
|
Syrup |
Sugar |
Water |
Yield |
|
Light |
2 cups |
4 cups |
5 cups |
|
Medium |
3 cups |
4 cups |
5 1/2 cups |
|
Heavy |
4 3/4 cups |
4 cups |
6 1/2 cups |
Step 4:
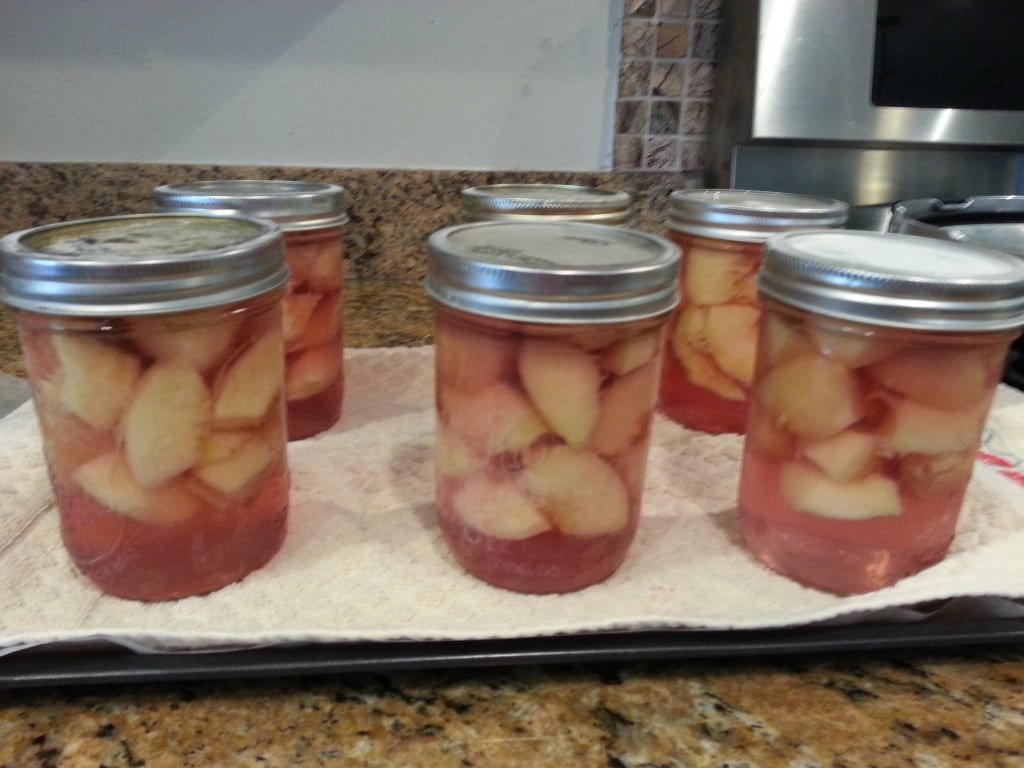
When the fruit and jars are ready, you can begin the canning process. Remove the jars from the hot water one at a time and fill with the fruit. Pour syrup into each jar, leaving a half-inch of space at the top.
Step 5:
Before you put the lids on, wipe each jar rim with a damp washcloth. It is important to make sure the jar rims are clean before you put the lids on, or they won’t seal properly (and the fruit will spoil). Put on the lids and screw the bands on tightly. Make sure they are tight!
Return the full jars to the hot water and turn the stove back on high, and bring it back to a boil. Boil (process) the jars for 25 minutes. Yes, 25 minutes…
Step 6:
When done, remove from hot water and cool. I place the jars on a towel to prevent them from cracking on the cold counter. When cool enough to handle, label the jars with contents and date.
Step 7:
ENJOY! You know can have peaches year round!
Pictures: